Most of the time you would simply toggle one pin at a time on a microcontroller, but each pin takes its own small amount of time to be turned on. Using the code below you can change the state of 14 pins at the same time with a max frequency of 5Mhz all at one time.
If you want the fastest way to turn on a pin see the following code below. This simultaneously turns on 14 pins and then off 14 pins using a PIC32MX250F128B microcontroller.
// PIC32MX250B128F microcontroller
//using DP32 board setting in MPIDE or UECIDE
void setup() {
delay(2500);
// sets pins 0-8 as outputs and turned low
for(int i = 0; i<9; i++)
{
pinMode(i, OUTPUT);
digitalWrite(i, LOW);
}
// sets pins 11-14 as outputs and turned low
for (int i =11; i<15; i++)
{
pinMode(i, OUTPUT);
digitalWrite(i, LOW);
}
// pin 17
pinMode(17, OUTPUT);
digitalWrite(17,LOW);
}
void loop() {
while(true)
{
LATB |= 0xEFBF;
LATB &= 0x0000;
}
}
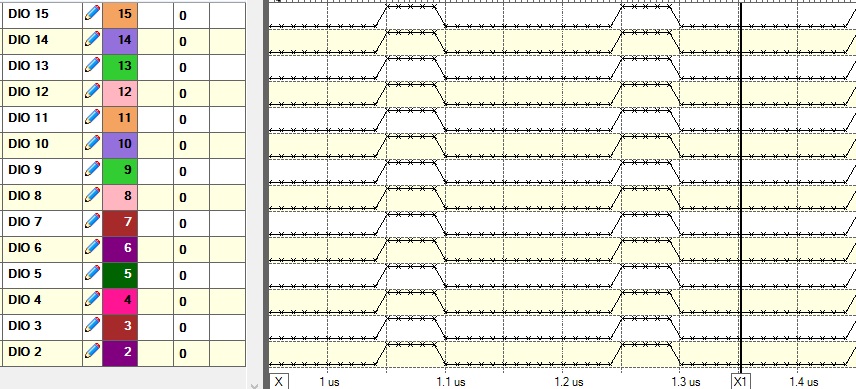
Below is a screenshot using a logic analyzer to see all 14 pins changing at the same time on the PIC32MX250F128B microcontroller. This was taken using the Analog Discovery™ using WaveForms™.

 RSS Feed